Saturday, August 27, 2016

Glue Reviews / What Glues to Use

 
As a DIY-hard crafter, I have a pretty impressive collection of glues. My glue stash is so sizable that I have devoted an entire drawer in my plastic 3-drawer rolling cart to "Adhesives." This includes tape (of which I have the masking, the duct, the sport, and the packing varieties), and I've also thrown in a few other bottles of household fluids there because they don't fit into a better category—WD-40 (the exact opposite of an adhesive) and foam insulation. But the glues! I have become quite a connoisseur of glues over the years, and today, I thought I'd share what I've learned with those a little newer to the gluing game.

Hot glue

Probably the first glue I fell in love with (yes, we of the more geeky persuasion do fall in love with glues), hot glue first hit my radar at the young age of 7 or 8 thanks to my Girl Scout troop leaders. My fair share of finger burns later (I can't believe they trusted us with such a dangerous weapon in 3rd grade!), I was hooked. My mom purchased a hot glue gun for the family, and it has been in my arsenal ever since! Hot glue is useful when you want to glue two things together and have the glue set quickly. Because it is bulky and messy, however, it is not so great for gluing small pieces, or for use in places that will get a lot of scrutiny. It also fails to bond to the vast majority of materials, (including pretty much all non-porous ones), so any attachment you create with hot glue should be considered more or less temporary. I like to use hot glue for quick-and-dirty crafting—assembling Halloween costumes, for example. It's also great for when you need a big blobby lump of glue, to actually form an architectural element in your project.

Tacky Glue

Another crafter's standby, Aleene's Tacky Glue is tried and true for many applications. Like hot glue, it works well only on porous materials. Unlike hot glue, it takes a lot longer to set, but it can be applied with much greater precision. The "Tacky" in its name is its greatest strength—because it's a thicker glue, the items you are gluing are more likely to stay in position until the glue has set...and once it has, it forms a waterproof bond. I use Tacky glue mostly for projects involving fabric (it's not a fabric glue, but it works just as well).

Epoxy

Around the time I graduated from college, I learned, from a friend who built model airplanes, that epoxy was the glue of choice if you really wanted to glue two things together and have them stick. Especially if the two somethings were somethings like metal. At first, I was a little intimidated by epoxy, because you have to actually mix a hardener with the adhesive, but that actually makes epoxy an ideal glue to have around, because it will never dry up in the bottle! Epoxy's pros are that I've never found any two substances it couldn't bond, and it's tough and dries hard. Its cons are that it's a little inconvenient to use, in that you have to mix it in a separate container before you can use it, and if your mixture ratio is a little off, you will get glue that never hardens. I use epoxy for repairing metal jewelry, and as a replacement filler for molded plastic (it's currently holding the wheel of my office chair into its broken socket, and I've also used it as a replacement for the heel tip on oddly shaped shoe heels).

Gorilla Glue

When I worked at the grocery store, my colleagues swore by Gorilla Glue, which I had never heard of up until that point. When I finally did give it a try, I was underwhelmed, although it does have its uses. Gorilla glue's greatest strength is also its greatest weakness—as it cures, it foams up, expanding into any cracks it's been placed into. This is great when you need to fill gaps, but it's terrible for precision applications. My friend's mom once used it to repair a broken china figurine of mine—it came back with brownish foam protruding from all the cracks. I also find Gorilla glue to be less strong than some glues—do not use it in places that will be subject to a lot of torque. What is it good for? Large-area applications. I am currently using it around the house to hold pieces of wood to various other surfaces.

Spray Adhesive

You've seen spray adhesive come up numerous times in my other blog—I've used it to hold up my socks as well as to make various paper and fabric crafts. In all those projects, I was using an old can of spray adhesive that I'd had since graduate school, where we were advised to use the substance to affix our design samples to mat board for presentation. So I can thank my master's degree for my knowledge of the strengths of spray adhesive: it is excellent for attaching one large flat, flexible surface to another one. Spray adhesive forms a thin, even coat that is unlikely to bleed unless you really overdo it. Objects with spray adhesive on them can usually be repositioned a couple of times before the glue loses its tack. But a big downside of this glue is that it is messy! It's hard to keep the aerosolized glue from settling onto everything in the vicinity (my design school actually had a gluing room, which was sticky from floor to ceiling due to all the overspray!), so when my last can of spray adhesive ran out, I haven't been in a hurry to replace it. I think I'm going to settle for rubber cement in the future.

Rubber Cement

My first encounter with rubber cement was when my mom created her influential dining table Halloween costume. She used rubber cement to affix plastic utensils to her tablecloth, and I was amazed, because up until that time, my experience of glue was limited to Elmer's School Glue, which as we all know, does next to nothing. Rubber cement is pretty awesome because it retains a degree of stickiness even after it dries. It dries faster than white glue, and because it comes with a brush, it can be applied in a thinner layer. I prefer rubber cement for all my paper-attaching needs, and I'm experimenting with using it to hold my clothes up (temporary verdict: it doesn't work as well as spray adhesive, but it is easier to remove from your skin.)

E6000

I can thank Pinterest for introducing me to this second-newest addition to my Glue Gallery. All the crafters who post tutorials involving attaching rhinestones to anything always recommend using E6000 glue for the purpose. If you don't know much about rhinestones, generally they have a very smooth shiny back which can be quite hard to stick to anything. So, intrigued, I bought a tube of the stuff. It says right on the label that it's industrial-strength, which sounds pretty good to me. I haven't had a lot of opportunity to use E6000 for very many applications, but so far I've reattached a couple of shoe soles with it, and they haven't come apart yet.

5-Second-Fix

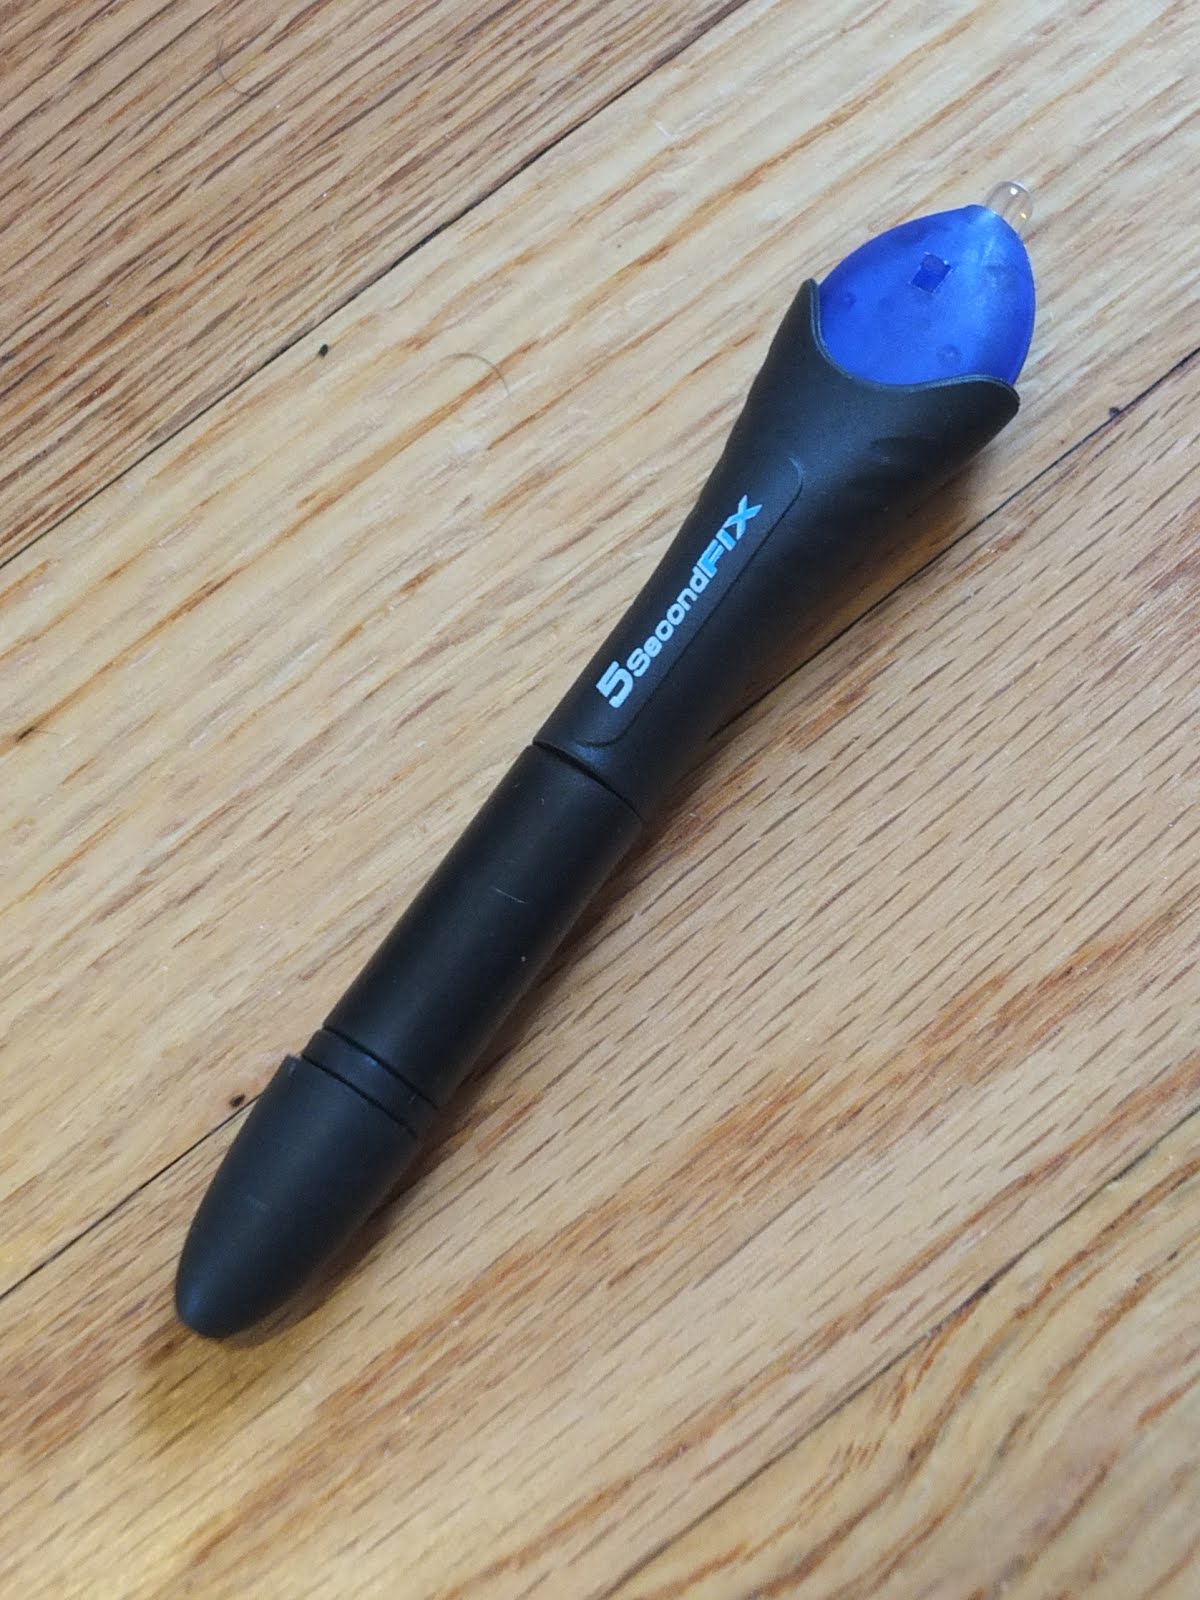
Normally, I'd be the last person to purchase something emblazoned with an "As Seen on TV" label, but recently I made an order that needed a few more items to qualify for free shipping, and the 5-Second-Fix was a pretty low price, so I threw a tube of the stuff into my virtual cart. So far, I can't say I regret my purchase. It seems to work the same way as dental fillers do (it might even be the same substance my orthodontist used to attach my braces!)—the glue remains liquid until you blast it with the attached UV light, and then it takes only 5 seconds to cure. For the limited amount of time I've had to try it, I have to say this glue is pretty awesome. Like hot glue, it dries fast, but unlike hot glue, it only dries when you're ready to dry it. Like epoxy, it bonds to a wide variety of materials and seems to form a strong, clear bond, but unlike epoxy, you don't have to pre-mix it and can use an infinitesimally small amount right out of the tube. My first and only use of this glue was to repair and reconstruct a couple of pairs of earrings, for which it worked like a charm—until the pair I repaired fell on the floor a week later and broke in the same spot... but I'll give the glue the benefit of a doubt—I might have just not applied it adequately. There are apparently lots of similar products on the market, so when it comes time to replace my 5SF, I might just look for a cheap generic.

Other options

I have other glues in my collection as well, but they are for really limited uses, but here's a quick rundown:
  • Elmer's glue stick (good for almost nothing except temporary bonds of flat porous materials like paper and fabric)
  • School glue (being water-soluble even when dry, it's only good for temporarily bonding things that you later want to wash out. I got it to use as a substitute for wax-resist in fabric dyeing, but haven't actually tried that yet)
  • Temporary Fabric glue (When sewing, you can use it for basting instead of pins, which fall out, or a basting stitch, which my sewing machine doesn't have. Fabric glue is a little tackier than traditional white glue, so it attaches things more quickly and securely)

Wednesday, August 17, 2016

Acadia National Park chocolate chunk cookie


Most of my Giant Cookie reviews tend to be of cookies I acquired in far-off places. It is a truly special occurrence when someone else brings me a Giant Cookie they acquired in a far-off place! Such was the case when one of my friends went to Maine and returned with this Acadia National Park chocolate chunk cookie. I really hoped this would be the best Giant Cookie I ever tasted, since he went to such effort for me, but sadly, that was not to be.

In fact, it was one of the most disappointing Giant Cookies I'd ever eaten.

My first bite tasted weirdly sour, with a syrupy taste that seemed familiar, but I couldn't quite place it. It was still sweet, but not quite as sweet as you'd expect a cookie to be.

The texture was soft, which I usually like, but in this case, it was just too uniform. Even the chocolate chips felt doughy when I bit them. Usually a softer texture goes hand-in-hand with a little more durability (think the fable of the reeds and the oak), but this cookie began falling apart as soon as I took it out of the package!

The sour note to the taste, the soft yet crumbly texture...I began thinking that this cookie had all the hallmarks of a vegan cookie!

It is unusual for a cookie company to sell a vegan cookie without advertising it as such, but when I checked the ingredients list on the back, I found that it was, indeed, made with egg substitute (and actually manufactured by the Wildlife Cookie Company). That explains a lot.

You can't hold vegan cookies to the same standard as good-old egg-based ones, but to try to pass one off to an unwitting customer without making its "special" nature obvious, that's just asking for a disappointed customer!

In spite of being a gift, this cookie still had the price tag on the back, so I know that it cost 3.99$ for 114 grams. That makes it 3.5¢ a gram... or, a rip-off, even by vegan standards!

The Bottom Line

Taste: 2 out of 5 stars
Texture: 2 out of 5 stars
Price: 1 out of 5 stars

In spite of all my negative words about this cookie, I still appreciate the gift, and want to assure all my readers that if they were thinking of bringing me a new and exciting Giant Cookie, to not be discouraged by the possibility that I won't like it. Not liking things is what reviewers do best!

Friday, August 5, 2016

Equidigital

Today is the momentous occasion of my 33rd birthday. What makes it so momentous?* Well, all the digits in the number are identical! That only happens once every 11 years (or less, if you happen to live past 111), so it's definitely something to celebrate.

However, in searching for a word to describe such an occasion, I found that none exists! Really! None! In this world where we like to assign especial importance to some ages (e.g. 40) over others (e.g. 23), it seems astonishing that there's not a word to describe this special set of birthdays. Certainly, birthdays like 33, 55, and so on are palindromes (and many people make special recognition of palindrome birthdays), but so is 101, and that – though very impressive in many senses including its acknowledgment of sheer longevity – isn't a number where all the digits are the same. Although it has been suggested (probably by just one person trying to be funny) that we use the word "schnaplefest" for this type of birthday, that hardly seems to be common usage, and it still doesn't describe the number itself—just the celebration of the corresponding birthday.

So what is the word for a number in which all the digits are the same? As far as I can tell, in this vast and ever-growing language we call English, there is none! I am completely floored by this simple and fundamental gap in our collective vocabulary. But I have a solution. We'll make a new word!

And it's going to be "equidigital!"

In thinking about this neologism, I really got attached to the prefix "iso," which means "equal" and is Greek in origin. I originally decided on "isodigital," but "digit" is Latin-based, and my purism just wouldn't allow me to combine languages like that! Fortunately, "equ" is a Latin prefix, and means (unsurprisingly) "equal" as well! If you want to be really strict about it, most words with an "equ" prefix seem to refer to a sense of balance between two things rather than unlimited comparable identities, but in a strictly literal translation, "equidigital" means "having equal digits," and it has a better ring to it than other possibilities I considered. When you're making a new word, you have to make sure it's catchy and pronounceable, after all!

So, happy 3rd equidigital birthday to me! I can't think of any better present than a brand-new word!

*Another reason this year is momentous is that I'm exactly half the age of my dad! That only happens once in a lifetime!

Tuesday, August 2, 2016

How not to replace your dishwasher

Here is a fun and cautionary tale of my first experience in installing a home appliance! If you are looking for valuable tidbits of advice and not an epic narrative, scroll down to the bottom for my hard-won conclusions!

I knew from Day 1 that the dishwasher in my new house didn't work. Fortunately, my house came with a home warranty, and I had high hopes that I'd be able to use said warranty to get the dishwasher replaced. Supposedly, after you pay a 100$ deductible per service visit, this home warranty pays for the repair of mechanical failures of appliances and certain other things. However, it rarely pays for what you need it to pay for, and I caught on to that pretty quickly after reading just a few reviews of the warranty company online.

So, I got a little insurance for my warranty: I bought a used dishwasher on Craigslist for 40 dollars. My plan: I would call the warranty company and have someone come out to look at the dishwasher. If the warranty wouldn't cover its replacement (not just repair, because this dishwasher was so rickety and rusty and horrendous that I didn't want to use it even if it could be fixed), then I'd ask him to install the new dishwasher for me.

Sadly, that didn't work out. He ran the old dishwasher, explained that the machine was working but not draining, that fixing the drain hose would not be covered by the warranty, and that he couldn't install the other dishwasher OR disconnect the old one unless I wanted to pay a couple hundred dollars for the service. I didn't. I sent him on his way, and resigned myself to learning how to install a dishwasher.

One of my friends, who had never installed a dishwasher either, but was inexplicably interested in the "learning opportunity," offered to help. So together, armed with an arsenal of YouTube videos and step-by-step internet articles, we began. For those who are as clueless about dishwashers as I was before I began this, the installation of a dishwasher is a theoretically simple task. It involves connecting 3 wires, one hot water supply hose, and one wastewater drain hose. We already had the supply hose and the drain hose from the previous dishwasher, so all we really needed to do was disconnect them from the old dishwasher and reconnect them to the new one. My friend was confident that we were going to be able to do it. I was equally confident that everything was going to go wrong. I'll let you decide who was more right.

Installation attempt 1

We had all the tools needed for a proper installation, except for electrically. Since I didn't have a circuit tester, we just had to trust that I'd actually found the right breaker down at the circuit box. My friend had lots of fun pretending to be electrocuted when he went to disconnect the old wiring. Ha ha. 

When we got the old dishwasher disconnected and went to put the new one in its place, we ran into some problems, some of which just involved annoying amounts of extra labor. This is going to be a long story, so I'll spare you all the agonizing details, but the most serious problem was that the drain hose that we had was too big for the drain outlet stub on the new dishwasher. There was a second, capped stub that was a better size, but we didn't know what to do with the smaller one of we opened that one. We tried a series of solutions including cannibalizing a bit of hose from part of the old dishwasher, which we thought could be used as an adapter. Unfortunately, all it did was come apart the moment we put the new dishwasher back into its space. I can't even remember all the things we tried to make this too-small stub fit the too-big hose, but I do know that none of them worked, and after a couple of hours monkeying away, we gave up.

At this point, I turned the water to the sink back on and noticed the flow had decreased dramatically, as if my house were deliberately rubbing salt in my wounds. Fortunately the flow spontaneously returned to almost normal after a few hours.

Installation attempt 2

The next week, I went to a plumbing supply store and bought two parts, at a cost of 18 dollars, to try and solve the problem. They didn't. But they did cause me to close my water shutoff valves a second time, and this time, the water never started flowing again! I waited a day and then reluctantly called the warranty company to get me a plumber.

Installation attempt 3

Surprise! The warranty didn't cover the cost of fixing the sink, but the plumber was nice enough to take some time to do it as an independent contractor. He even tried to help me with the dishwasher. He didn't have any trouble connecting the too-large drain hose (he just kept clamping it until it was snug—Occam's Razor in action!) but when we ran the dishwasher, we found it was leaking from someplace other than either of the drain outlets. Fail! Again! He advised me to just get a new dishwasher, because even if we could find the source of the leak, this one was old as the hills and probably not long for this world. 

So let's take a step back and tally what this dishwasher issue had cost me so far: 40 for the dishwasher, 18 for the useless parts, and innumerable hours (OK, probably around 4) that we'll never get back! Also 220 dollars for the plumbing work that wouldn't have been necessary if I hadn't been constantly fiddling with the shutoff valves while failing to install the dishwasher. We're up to 278 dollars. 

Installation attempt 4

Having thrown away 278 dollars, I was especially resistant to buying a full-price dishwasher and bringing my grand total to around 700 dollars, so I started shopping around for used dishwashers again, this time at actual stores that have a return policy. I found Community Forklift, which is a local store selling reused construction materials and appliances. They were having a 30-percent-off sale, so I booked it over there and found a large selection of dishwashers of various ages! One of them looked newish, came with both a supply hose and a drain hose, and was only 25 dollars, so I bought it for 18 dollars (after discount) and prepared myself for another round. P.S. I'm totally sold on shopping at Community Forklift for all my future home-improvement needs.

This time, having a new drain hose that came with the second new dishwasher, I knew I had to disconnect the old drain entirely. I had learned in the research phase of this project that there's a plug inside the garbage disposal, where the dishwasher drain connects, and it has to be removed before hooking up a dishwasher. Part of me suspected that it hadn't been, but I'd ignored the disposal end of things during my previous attempts because I felt like the disposal was too far back in the sink and would be hard to access. But I knew I couldn't ignore it any more. And, surprise! It wasn't actually hard to access at all. And, surprise again! The disposal plug was indeed still intact, meaning that we could have installed brand new dishwashers until kingdom come and they never would have drained. Sigh.

I read a couple of tutorials on how to remove the dishwasher plug from a disposal that was already installed, and, feeling confident that I could do it, followed the instructions. But then, once the plug had been knocked into the body of the disposal, I couldn't find it! I reached around with my hand, digging into the slime of disposed items past, and there was no plug. No bits of plug. Nothing. But when I ran the disposal, I could hear it grinding raucously like it was about to explode! Thinking that maybe the plug had somehow gotten into the motor of the disposal, I removed the unit entirely with the help of still more tutorials. I shook it upside-down. Nothing. I looked inside. Nothing. I looked inside with a flashlight. Nothing. I turned the rubber drain cover completely inside out, looked inside with a flashlight again, and finally found the little plastic piece of drain plug trapped between a blade and the wall of the disposal. Once I knew where it was, it was simple to get out—I definitely hadn't needed to remove the entire mechanism.

By this time, my partner in appliance installation had arrived for our 3rd joint attempt, so he helped me put the disposal back, and we set out to install the dishwasher.

Annoyingly, the supply hose that had come with the dishwasher was the wrong size for our plumbing, so we had to painstakingly remove the 90-degree fitting (that's a thing in dishwashers) from the second dishwasher, where we'd haphazardly installed it after removing it from the first dishwasher, and jam it into place on the third dishwasher. Of course it took several attempts to get that right. Fortunately we were old pros at hooking up the drain line by this time, so that part was a piece of cake. Then it was finally time to run the dishwasher. And it worked! It didn't leak! It drained! It seemed perfect! Except for one little thing. 

It wasn't secured to the countertop, and consequently fell out of its cubby whenever the door was opened too vigorously. And of course, it was a tad too tall, so when it was jammed into place, the door wouldn't shut any more. To make it fit, I decided to shave away some of the wood under the countertop. Since the dishwasher was already taking up most of the work space in that area, and there was no way I was going to unhook it another time, I had to find a way to do some extreme carpentry in a very small space. I ended up drilling a couple dozen holes into the wood, creating a line of perforations which weakened it to the point where my boyfriend could splinter it off using brute force and a screwdriver. It was messy. It was smelly (the wood burned when I drilled it). It took about an hour.
A closeup of our artistry
 And after all that work, I found that even though the dishwasher had some clearance under the counter now, the door still wouldn't shut when the unit was actually screwed into place! Forced to explore alternative solutions, I then discovered that the latch could be bent into a position that allowed the door to pass smoothly. Meaning I had just wasted half the morning mutilating my counter for no reason. 

The fruit of 3 weeks of labor
But after that, we were finally, well and truly, finished with the dishwasher. It works!
And I've learned a valuable lesson: Never try to install a dishwasher without professional help.

Haha, just kidding. I'd do it again...if someone held a gun to my head...but I'm sure it would be a lot easier the 5th time around, since I actually did learn some valuable lessons. Here they are.

Conclusions

1. If you're going to install a dishwasher for the first time, try to make it a new one that comes with a connection kit. When you don't know what you're doing, minor incompatibilities in parts can turn into total stumpers. And plus, if you are installing a new dishwasher, you can get phone support from the manufacturer.

2. If you are going to buy a used dishwasher, at least take the time to ask the seller some questions. Where's the drain hose? What size nut is on the water supply hose? What's this thing do? Sure, it can feel awkward to look like an idiot, but the awkwardness will be over soon, and you'll be much better prepared for the actual installation, which is the real hard part.

3. Don't assume something won't work without actually trying it. We never bothered to try to connect the drain hose to the small stub because I just assumed it would leak. But if we'd only tried that, the most obvious solution, from the beginning, we could have potentially saved ourselves hours of work and damage caused by repeatedly removing and replacing parts.

4. Likewise, don't assume something does work without testing it. If I hadn't been so afraid to take the drain hose off the garbage disposal right from the outset, I might have actually gotten the very first dishwasher to drain without having to go through Four Impossible Installation Attempts.

5. And lastly, if you're doing this installation in an old house, don't overtighten your water shutoff valves! Dealing with a little trickle of water during installation is preferable to having to replace your shutoff valves and faucet because you broke them.

Monday, August 1, 2016

House-poor

When I originally purchased my house, I had every intention of reaching a point where I could say everything was paid for, and then I would triumphantly share the hilariously large bottom line here on my blog. I thought that point would be as soon as I had settled in, cleaned up the mold in the basement and attic, fixed the broken dishwasher, cut an egress window in the basement bedroom; and I was living happily and comfortably with renters paying most of my mortgage for me—surely within the first month of owning the place.

I have come to realize that ... ha ha ha ... excuse, me, I can't finish my sentence because I can't stop laughing. If I thought I was ever going to be done fixing up this house, I was oh, so very wrong! Before I moved in, I knew there were a couple of flaws that I'd need to repair, but after I moved in, everything that I thought had been working suddenly stopped! The washer, the dryer, the garbage disposal—all were nonfunctional! A technician from the gas company came in to turn on the gas, deemed the furnace and the water heater to be safety hazards, and turned them both off! My house was a beautiful skin with no muscles inside! I spent a couple days crying on the floor, then I slowly got around to getting things fixed.

I realize I'm never going to be able to say I'm done paying, but I did promise that I'd dedicate an entire post to the financial side of my home purchase, so here goes, at least a fairly accurate tally of what I've spent so far!

The housing search alone was a significant drain on my finances. I paid for 1.5 home inspections, one appraisal, and one pest inspection on houses that I didn't even buy, which amounted to 1,290$ just thrown to the wind!

But that's peanuts compared to what I paid to actually buy this house. A glance at the final page of my closing documents reveals that the total amount spent at settlement was 292,252.96$. Some of that includes pre-paid homeowner's insurance and taxes, but most of it's the cost of the house itself (278,000) and fees. Of course, 15,000 of that sum is covered by the CPCUP home-ownership loan, which I never need to pay back, as long as I live in the house for 10 years.

I have always kept my money distributed in accounts at several banks—different banks offer different benefits, and it's nice to be able to do my banking wherever I happen to be. This has never caused a problem for me before, but it really threw a kink into my home purchase. In order make my down payment, I had to use money from 3 banks, each of which charged a different wire transfer fee or withdrawal fee. Although I neglected to tally the exact amounts, these fees cost me around 100 dollars in total. If I'd pulled all of my money from one bank, I probably could have gotten that cost down to just 20.

When calculating how much money I'd need to buy a house, I knew I had the cash for a sizable down payment, and thanks to the CPCUP loan, I'd even have quite a bit left over after the closing. What I neglected to consider was that, when your money is spread among three banks, two of which have minimum balance requirements of 5,000$ each, the actual amount of money you're free to spend is a lot less. By the time I'd finished paying the mold remediators (3,501.40$), I was scraping the bottom of my financial barrel. I have become one of those people who has to check their bank account before they buy anything—and that's a strange thing to be when 8 months ago, I could foot the bill for a 6,000$ vacation without batting an eyelash.

I've thought about closing one of my accounts or finding a different one with a lower minimum balance, but I realize that having 10,000 dollars that you're unwilling to spend (lest you incur an account maintenance fee!) is probably a good idea, so I think this annoyance might have been a blessing in disguise.

Annoyances—that's how I classify most of the major financial blows in the multiple thousands of dollars. They were pretty much expected, so they don't bother me too much. But now that I'm a homeowner, it's the ongoing nickel-and-diming (or the 21st century equivalent, which is more like twenty-dollaring and fifty-dollaring) that's really getting to me.

Within the first couple of weeks of living in the house, I had shelled out 300 dollars to buy missing home essentials (like fire extinguishers) and pay for minor service visits. This probably doesn't seem like much to most readers, but to me, it felt like being stabbed to death with tiny needles when it was spread out over 8 annoyingly frequent transactions. I'm trying to recoup my savings, not burn the rest of them on stupid things like a disconnected dryer!

On the plus side, though, I feel like I was blessed with a fortuitous influx of free things! When I moved in, I hardly had any furniture, and I expected that it would be a major struggle to get some. I was also missing several little things, like shower racks for the bathroom, waste baskets, and the like. However, free furniture basically fell into our laps, and I'm pleased to announce that most of the things I thought I'd have to buy, we have acquired at no cost. I even found an antique ladder in the attic that I was able to sell for 40 dollars, plus a dozen DirecTV signal splitters in the shed, which are going for a pretty penny on eBay, so I'm working my way to a net positive. Sort of. If you don't believe me, see the tally sheet below. I estimate I'll get back in the black shortly before I die of old age.

Item
Cost
Notes
3 Inspections
1380.00
590 + 590 + 200
Two appraisals
1000.00
500 + 500 
Wire Transfer fees
100.00

Cash to close
292,252.96

Mold remediation
3,501.40

Egress window
0
Not done yet
Lock for shed
8.00

Fire extinguisher
16.40
Two aerosol canisters
Dehumidifier
25.00
Used, from Craigslist
Miter saw
10.00
May not be usable
Remove 2 wasp nests
0
Ha! We got those wasps ourselves with a hose!
Extension Ladder
25.00
Used, from Craigslist
Fix disposal*
100.00

Dishwasher*
76.00
40 for a dishwasher, 18 for parts, 18 for another dishwasher 
Fix sink*  
220.00
* The disposal, dishwasher, and sink together make a story that is worthy of an entire blog post on its own. Stay tuned!
Fix furnace
0
Not done yet
Fix dryer
75.00
“Turn on gas supply to dryer” is more accurate
Sofa
0
4 lamps
0
shower caddy
0
Garbage can
0
Coffee table
0
Bookcase
0
Second wardrobe
0
Attic ladder
-40.00
DirecTV splitters
-26.33
298,723.43

Thursday, July 28, 2016

Valerie's Adventures in Cooking: Sweet Potato Kale Gratin

While visiting a farmer's market over 4th of July weekend, I ran across a vendor who was selling damaged produce at 50% off. Never one to resist a good bargain, I stocked up on all the vegetables that actually meet my dietary restrictions, one of which was a lone sweet potato.

Today, only 3½ weeks after purchasing the sweet potato, I got around to actually cooking it. Normally with a sweet potato, I'd slice it up, dip it in oil, and bake it, in the hopes that it would turn into sweet potato fries (usually it turns into sweet potato mush with crispy edges, but a girl can dream), but I have a bag of heat-and-serve sweet potato fries in the freezer, and I have confidence that those would taste better than any fries I could ever whip up myself, so it was time to try a new recipe: Sweet Potato & Kale Gratin.* Who's ready for an Adventure in Cooking!?

Sweet Potato & Kale Gratin (VAiC Style!)

Ingredients:

  • 3 lbs. sweet potatoes, peeled and thinly sliced (Well, you already have a problem, because your lone sweet potato is only 6 ounces. Decide to just make a third of the recipe and round out that first pound with a regular potato.)
  • 1 large bunch (about 1 lb.) kale, tough stems removed and leaves torn into bite-sized pieces (A third of a bunch = well, just about all the kale you have—how convenient!)
  • 1 c. shredded Parmesan cheese (Lacking parmesan cheese, think back to another similar recipe you found that used white cheddar. You don't have that either, but you do have yellow cheddar, which is basically the same, right? Right! One third of that is...ah...we'll figure that out later!)
  • 1 pint heavy whipping cream (Who keeps whipping cream in their house!? Plan on using a single-serving tub of yogurt instead, until you open it up and realize it's actually sweetened vanilla yogurt. Not going to fly. Instead, get out the last packet of dried milk in your pantry. It will have to do, even though the creator of the recipe is quite adamant that you only use real whipping cream).
  • 1 tsp. salt
  • 1/2 tsp. freshly ground black pepper
  • 1/2 tsp. ground nutmeg (Nutmeg sounds gross in a gratin. Leave that out.)
  • 2 tbsp. Organic Valley salted butter, cut into small pieces, plus more to grease baking dish
Preparation:
  1. Preheat oven to 400 degrees.
  2. Steam kale for about 3 minutes, or until wilted, in a large steamer basket set over boiling water. Nonsense! Dump that kale in a 2-qt casserole dish, pour some water on top, and microwave for 2 minutes! You just saved a minute! Pat yourself on the back. Squeeze out excess water.
  3. Place half of the potatoes in a greased 9 x 13 baking dish. Since you have drastically reduced this recipe, 9x13 is going to be far too much. You can do it in that same casserole dish you heated the kale in. You just saved yourself from washing a dish! Pat yourself on the back.
  4. Top potatoes with kale, then top kale with half of the cheese. Since you haven't actually measured out the cheese, just grab handfuls of it and sprinkle it on until it looks nice. Misread the previous instruction and top the potatoes with only half the kale. Place remaining potatoes in dish and sprinkle with the rest of the cheese (another generous handful). Top the whole pile with the other half of the kale.
  5. To make the milk substitute for whipping cream, pour most of the packet of powdered milk in a bowl (no need to be precise here; you never are) and dump a little water on top. Whisk together until it looks approximately like the consistency of whipping cream. Taste-test. Wow! It's super-sweet! You didn't remember that milk was so sugary!
  6. Whisk together the "whipping cream", extra salt to counteract the sweetness in the milk, extra pepper to do the same, and pour over casserole. 
  7. Dot with butter. By dot, I mean haphazardly cut a few chunks out of a lump of margarine that's been sitting in your fridge and wipe them clumsily on the kale, wishing they would be a little less attached to the knife. While you're wishing, wish you could use all of the margarine because you hate having partially eaten sticks of shortening lying around, but refrain because your cheese choices have already raised the heart attack quotient of this dish by at least 4 points.
  8. Cover baking dish with aluminum foil (haha! this is where using the casserole dish really pays off! You can just cover with the lid, and save a big old sheet of foil! Pat yourself on the back.)
  9. Decide that since your casserole has turned out pretty deep, you might want to cook longer and at a lower temperature. Reduce oven to 350 degrees.
  10. Bake for 25 minutes. Remove casserole lid and bake for 25 minutes more, or until potatoes are tender and cheese is golden brown. Allow to sit 15 minutes before serving, preferably while taking your obligatory photos.
 

The verdict:

Surprisingly good for an Adventure in Cooking! The potatoes turned out mostly tender, the watery milk mixture mostly evaporated away to an ideal thickness, the sweetness of the milk mostly wasn't noticeable, and the kale that I accidentally placed on top didn't burn but turned nice and crispy and delicious. In fact, my least favorite thing about the product of this Adventure was the one thing that was by design from the beginning: I wasn't really crazy about the sweetness of the sweet potato paired with the saltiness of everything else. It's a good thing I had to use a regular potato, because that enabled me to have at least a few bites that weren't sweet.

*The original recipe was found on the Oh My Veggies blog.

Wednesday, July 27, 2016

Racerback ≠ razorback

Usually I wait until I have several peeves all bottled up inside me before letting loose with a critical blog post on how not to use the English language.


But this time, the need is dire, and the critical post is coming right now, with only one case on the docket: razorback vs. racerback.

Racerback is a common term used to describe the backside of a certain style of tank top: to wit, one that is basically open around the shoulderblades, with just a thin strip of fabric running up the spine. I hear that this style of tank top (or swimsuit) got its name from competitive swimmers (i.e. "racers") who need to have a full range of motion for their scapulae.


The above pictures are racerback tops. Do you know what they are not? Razorback tops. 

I see the word razorback being thrown around all over the internet to describe this style of tank, from eBay to any number of fashion blogs. But they are all wrong. A razorback is a type of hog. It is not a type of shirt.

Please stop using it that way, and let the pigs keep their title!

two feral pigs in a grassy area

Monday, July 18, 2016

Welcome to my house


Most of those who read this blog will be invited to see its interior at some point. But the best time to see a house is right after its occupants have moved in and everything is willy-nilly, right? I wouldn't want you to miss out on that experience, so let's waste no time in going on a virtual tour.

Starting with the light-filled, maple-floored living room. 
 
 
The living room is the heart of any home, so we put extra effort into making it a warm and welcoming space. To create a harmonious atmosphere, we outfitted the (free! Thanks, Craigslist!) couches with mismatched slipcovers. The brown one is an especially nice touch, contrasting beautifully with the plethora of white and tan dog fur that has already made its home there. In the background, you can observe a traditional Chinese watercolor, partially obscured by an upside-down wardrobe. This piece of modern art symbolizes the struggle that faces so many individuals today—having too many clothes and not enough closet space.

As you look closer, you'll see we have adorned our furniture with a variety of useful items, ranging from a blender (always a good thing to have in a living room) to a box of home fixtures and fixatives, which will surely be put to use sometime within this century. 

One of the most useful things a home can have is a handyman, and you can see ours really showing off his skills on the couch. Notice the positioning of his feet. He has carefully arranged himself so as to avoid the second-most useful things a home can have: a dog. This dog (look closely, he's camouflaged by partially burying himself in the cushions) might look peaceful and asleep, but under that calm exterior, he is hard at work, busy shedding as much fur as possible over the beautifully contrasting slipcover we already mentioned.
 
 
Now on to the bedroom. Unonpened boxes dominate the decor here, but a keen eye may be able to spot the bed, which still lacks a frame.


Next to the bedroom is the closet/dressing/activities room, which has been designated as the place where everything other than sleeping shall occur. Contrasted with the spartan bedroom, it may look cluttered and chaotic, but believe me, it has a place for everything, and everything's in its place. Except for that second wardrobe in the living room. Where ever are we going to cram that?


On to the bathroom. This one features the spray bottle of ammonia that I was using to clean the reusable furnace filter. Sadly, years of cooking grease seemed to have coated that as well, so eventually I gave it up for lost, its only legacy being the clods of gunk that ended up adhering to the walls of the bathtub.
 
 
Next we visit the guest room, which is the tidyest and most Zen-like room in the house. Naturally, it goes unused as we can't have guests while the rest of the house is in such chaos, but sometimes we like to come in here just to enjoy a space that isn't cluttered with detritus and dogs.
 
 
The kitchen is one of the features of the house that always impresses visitors, as it was recently remodeled with a real tile floor, warm honey cabinets, and a cute backsplash over the sink. You can see that it has black granite countertops, which are what house-flippers put into a house when they want it to look posh. When I was house-shopping, I learned to associate black countertops with a property that was all show and no substance. Consequently, every time I look at my countertops, I have flashbacks to all the times I wanted to buy a house but it had been superficially altered to fetch an excessive price...oh, wait, that was this house too. These countertops are a constant reminder of how I bought in to the cosmetic housing sham. How could I have sold out my principles for a tiled kitchen and a polished wood floor!? Why, oh, why, didn't I place more value on the age of the appliances? Whyyy —Oh, wait, we're on a tour. So, yes, looking at this cute-as-a-button kitchen, you might notice the dishwasher whose front panel is removed, because I can't for the life of me figure out how to hook it up. I went out and spent my hard-earned cash to replace the travesty that was the original dishwasher, and still can't get the new one to function! Why, oh, wh—oh, right. Tour.


Let's look at the basement, shall we? As I mentioned in my last post, it has the distinction of being finished. But not in the sense of actually being finished, since it has become the dumping ground for all the furniture we don't know what to do with. 

See that open door? That leads into the room we have designated the storage room, where still more chaos reigns. 
 
 
At least we got a bookshelf in there to help the room get organized—No thanks to the unusually low ceilings, which forced us to return the first free bookshelf we got back to the curb.


The basement also has this blurry room, which will eventually be less blurry and will replace the guest room we have upstairs.
 
 
An unremarkable second bathroom, except to the spiders and cave crickets, which seem to think it's the best room in the whole house! Thank goodness there aren't any of them in this picture, or I'd be squirming in disgust rather than writing this pleasant description.


The basement also lures you in with a second kitchen. Don't be fooled by the shiny black oven—this kitchen is actually unusable as a kitchen because the oven's console is burned out, and we will eventually be hauling it to the trash without replacing it. But in the meantime, it makes a handy shelf for storing laundry products...
 
 
Because the laundry room is configured so that you can't fit any shelving into it, and your only storage is a couple of milk crates hung from the walls. It also has no lighting, which is why there is a table lamp on top of the dryer.

I've heard from certain musicals that the very beginning is a very good place to start, but I have turned that rule on its head by making the first thing you see in real life into the last thing that you see on this tour. (It's cause I wanted to save the best for last...don't quit now!)  
 
 
On the home's exterior, you can observe such marvelous features as the white add-on mud room, the bay window, the porch swing that came free with the house, and, what's that shadowy shape off to the left in the foreground? Let's take a closer look!
 
 
It's... a peach tree! Or maybe an apricot tree...or, in any case, some kind of fruit tree. Settling into this house has been a series of unpleasant surprises, but this arboreal beauty is probably the nicest thing home ownership has thrown at me. A free supply of future fruit? Don't mind if I do!

Sunday, July 17, 2016

Home Making


I purchased my house on June 10, and a month and some change later, I am still sleeping on the floor, and my basement looks like a war zone. I didn't really think it would take this long to get settled in, but I guess I've really only been actually living here for a total of 15 days. 


Instead of actually getting down to business and tackling one of the 22 items on my ever-growing House To-Do list, I thought I'd take this time to share some insights and stories!

Let's begin with the biggest irony of my whole house-buying saga. One of my dreams has always been to eventually live on my own (or with my significant other) without the need for roommates or renters. In all my 10 years of being an adult, this has never happened (except for very brief periods during which I was searching for roommates or renters), but I always imagined that buying a house would enable me to achieve that dream. Originally I picked this house (and overpaid on it) because it had a finished basement with a separate kitchen. I planned to rent out the basement until I had saved enough money to live completely alone. But with everything being broken and way more expensive than I ever imagined, now I'm forced to live in it alone until I have spent enough money to fix all the things that are preventing me from renting it out.

People ask me when I'm going to have a housewarming party, and my answer is: Haha, good one! Maybe when I stop feeling this crushing sense of futility whenever I walk through the door! That should be sometime within the next 10 years!

There is a lot to be done. A lot. It's overwhelming. It's disheartening. It provokes me to wonder if buying a house was the worst decision I ever made. But there are a few things about it that feel good—like unsubscribing from all my housing searches. I had housing searches saved just about everywhere you can imagine: 21 altogether, on 6 different websites. I have been getting a big kick out of deleting all of them, one by one. Take that, Zillow! I don't need you any more!

I also really enjoyed placing my first online order to be shipped to my new address! Haha! Using only one address line and no apartment number!? My life hasn't been this easy since September of 2015! 

Speaking of easy, let's talk about the things that make even the worst tasks a piece of cake!

Remember when I proclaimed my love for degreaser a few years ago? Well, when I moved into my new house, I found most of the kitchen surfaces absolutely caked with grease from what was apparently decades of constant frying (my theory is supported by the two – two! – discarded woks I found while cleaning various areas of the property). My beloved citrus degreaser didn't do anything to lift the mess. But then a coworker tipped me in to using ammonia. I already have ammonia (I use it for laundry odors when the fabric can't be bleached), so I gave it a shot. Wow, the grease just vanished without a trace! With ammonia by my side, I nearly suffocated learned that my bronze cabinet handles were actually pewter. Amazing! I don't think I'll ever need to purchase degreaser again!

While the best degreasing product was the least of many things I was wrong about regarding homes and homebuying (and I'm sure I'll be happy to tell you all about them in agonizing detail in future posts), one thing that I was right about, I predicted around this time last year: that I would either live on a street that I used to live on, or live in a house that looked just like a house I used to live in. As a matter of fact, I accomplished both. The house that I bought has the same floorplan as the house that I lived in on 53rd Ave (more or less—that was only for 6 months in 2007, so the details are a little hazy), and it's also on 53rd Ave! It's good to know that I can be right about the things that really matter.

Monday, July 11, 2016

Ode to a toaster oven

My pride and joy, respectively
If there was ever an underrated kitchen appliance, the toaster oven is it.

People have toasters, and people have ovens, but not many people (at least by my perception) have toaster ovens.

I calculate this by the health of the toaster oven resale market. My toaster ovens are always breaking, and I routinely get like-new replacements from Freecycle or the thrift store at prices ranging from zero to eight dollars. Apparently lots of people have toaster ovens they never use, and the secondhand ovens are not in very high demand.

I, however, adore a good toaster oven. So much more versatile than a regular toaster (try cooking your mozzarella sticks in one of those pop-up contraptions!) and so much easier to use than a regular oven (say goodbye to the 10-minute pre-heat!), the toaster oven is like a godsend for someone who consumes lots of leftovers and hates it when they're soggy. Since I've been head of my own household (about 2010), I've gone through around three of them. I even donated one to my office because the microwave just wasn't meeting my standards. Now that I've moved into a home with rentable space, I acquired another one to keep downstairs for guests (in some alternate future where the basement is clean and livable).

I might be the world's foremost toaster oven evangelist! If you are one of the unenlightened who have not yet experienced the joys of owning their own multi-purpose toasting device, come join me in my always-crispy bliss! I can probably even get you a free unit on Craigslist.


Sunday, July 10, 2016

Less is More: On having short hair


In December, I lopped off my long, luscious locks in favor of a layered bob.
How I looked before my last major cut
How I looked shortly after it.
Now this is certainly not the first time I've gone for a dramatic chop—it's actually the fifth, which means I've been following an extended grow-cut cycle for pretty much my entire life, and I've got it down to a science. But strangers don't know that, which might explain why everyone in the salon watched in shock and awe as my lengthy tendrils hit the floor, and the stylist asked me if I was sure what I was doing. And this was actually the shortest my hair has ever been before a major cut! I remember the last time I did this, I also got major backlash from those who preferred my hair long.

People seem to take great stock in long hair, as though its loss is an affront not just to its owner but to the entire world. As though you're a traitor to womanhood if you don't have a waterfall of keratin cascading down your shoulders at all times.

There seems to be a downright stigma against short hair. Sure, there is something to be said about the labor of love that is long hair. A person who spends hours a week caring for her tresses is a person who cares about her appearance. A person whose hairstyle is by nature low-maintenance could be interpreted to be a person who's just lazy.

But the ironic thing is that I think I look prettier with short hair. It has natural body and bounce, which it lacks when I wear it long. With my short hair, I wash it (don't even bother to use conditioner), towel it dry, brush it, and then ignore it while it air dries. Periodically I might fluff it with my fingers if I think about it. I spend all of five minutes a day on my short hair, but it generates compliments like it was created by an entire team of stylists for a Vogue photo shoot! I never heard a peep about my hair back when I was blow-drying it for 30 minutes a day. No one ever had anything nice to say about the elaborate updos that are the one thing I miss about having long hair. There was a time in my life when ridiculously long hair was a source of immense personal pride. But those days are long past, and short hair apparently suits me.
How my hair basically looks now.
Once the dust settles from my big move and I'm ready to focus on my style again, I plan to try out an even shorter hairdo. And then after that ... ? Will I ever grow my hair out again? Do I have anything to gain by dangling a foot or more of easily-tangled tresses from my cranium? Would I be better off sticking with the style that not only requires almost no work to maintain, but also seems to meet with the most critical acclaim?

My last dramatic chop was my fifth, but could it be my last? [Insert stirring music here.] Only time will tell.


Thursday, June 30, 2016

Crimes against language—what you can do to help

We live in a violent society—people are murdering the English language on a daily basis. Sometimes the pressure of witnessing it all gets too much to bear. But there are things you can do to help. Things that you can do to turn this trend around. Even one person can make a difference, and today, I'm going to show you three little ways you can try!

Use some discretion


This is mostly a spelling issue, but an issue in which a different spelling denotes an entirely different meaning! If you do not know the difference between discreet and discrete, I urge you to just use the words "subtle" and "separate" instead.

Don't use the third wheel

"Third wheel," is one of those phrases that gets thrown around a lot without anyone considering what it really means. I myself am guilty of using this phrase, to refer to the odd one out in a group of three people. From the way the term is used colloquially, one would assume a third wheel on any sort of vehicle is not only unnecessary but downright detrimental—which is, of course, a fallacious assumption! A bicycle, the quintessential two-wheeled vehicle, certainly functions quite adequately on two wheels, but the addition of a third wheel would certainly add stability. And a car with only two wheels would be in sorry shape indeed, but with three wheels it might even be able to get around. So why is a third wheel approached so negatively?

Misplaced decimal points

This problematic usage of syntax transcends languages and sticks its dirty toes into the pool of mathematics. 

I have lately been overwhelmed by the number of shopping stories I read on the Internet describing prices as something like ".50 cents." While there is a chance that someone purchased a dress for 50/100ths of a cent, it seems a lot more likely that the price was actually "50 cents" or ".50$" (Lest you wonder why I have committed a syntactical sin in this very rant, please see more on my unconventional placement of the dollar sign). Let's make it perfectly clear. A decimal point indicates a fraction and should be pronounced if it is written. So unless you actually bought something for "point fifty cents" you should leave the dot out of the equation. 

By the way, one of the most useful tricks I ever learned in writing was the Windows shortcut for the cent character: Hold down ALT while typing the numbers 0162 on your numeric keypad. Tada! Magic cent! I also use these shortcuts for the em dash (— ALT+0151) and en dash (– ALT+0150) – which litter my writing – on the regular.

Thursday, June 16, 2016

While I was waiting


As you might recall (from way back in November, ugh!), when my original plan to buy a house last July backfired the following month, I signed a 3-month lease at an apartment. Obviously my three-month estimate was way too optimistic, because – even though I'm a homeowner as of June 10 – that's the same apartment I'm living in now. In the 9 months that I've (begrudgingly) called this place home, I've renewed my lease twice, but every time, I always thought I wouldn't be here much longer. And that's resulted in some interesting living situations.

I refused to update my address. Though many of the companies that send me mail got my forwarding order and proactively changed it themselves, many others still think I live on 49th Ave. This proved to be quite confusing when it actually came time to fill out my loan, since I had different addresses on different documents and no one was actually sure where I lived.

My apartment came with a standard-issue manual thermostat. But you can't save on your heating bill when your furnace is constantly running even when no one's home! So I purchased a programmable one, intending to take with me when I moved out...which was going to be sometime soon. However, the original thermostat was basically painted onto the wall, and I didn't want to risk damaging the paint job for just a month or two of programmable climate control. So I just let the old thermostat stay there, while the new one dangled from its wiring for 9 months.
 

In a similar vein, I didn't want to get billed for repairing a bunch of holes in the wall if I was only going to be a short-term tenant. So when it came to hanging things, I relied on lots of Command adhesive and a couple of existing nails. Resulting in interesting decor such as this one-nail bulletin board.
 

In the epitome of bad timing, only a couple weeks before my original landlord gave me notice, I had bought a lawn mower. Any other lawn mower, I probably would have just sold and tried to replace whenever I moved into a real house again. But this was brand-spanking new and 400 dollars! So I did what any obnoxious person would do: I enlisted a friend with a house of his own to store my lawn mower for the (undoubtedly brief) time I would be living without a yard. And since he was already storing my mower, why not have him store all the other contents of my shed? I put it all in the box the mower had come in and entrusted it to his care. For a couple months that turned into 9. Surely, I owe this friend a home-cooked meal for his trouble, but since he never reads this blog, he's not going to know about that!

While I was living in an apartment, I turned into a box-hoarding packing-rat, because someday soon, I was going to be moving out. Whenever I got a shipment of multiple shoes (oftener than I should have), I would save the big outer box and stash it away, empty, somewhere in my apartment, to use as a moving box. When our office flooded a few months ago, a mold restoration company came to clean up and had us pack everything in big cardboard boxes. When the restoration company left, I kept the boxes, storing a few choice things inside so no one would be tempted to throw them away. Everywhere you look, I have boxes within boxes within boxes. Boy, it will feel good to be getting rid of them!

Except now I'm moving. I won't be getting rid of my boxes, I'll just be storing them in a different location! I see ahead of me, several more weeks of living with my boxes. But they will finally be full of the stuff they were intended for!

Wednesday, June 15, 2016

And you may ask yourself, "How did I get here?"


One year and 3 months ago, I began shopping for houses, and I am infinitely relieved to say I finally bought one. Yes, the predominant emotion that I feel as I prepare to move into my new home is relief. I can't say I'm excited – there's still too much work ahead of me for that – but I am so happy I no longer have to live in suspense any more!

I started out last February of last year, bright-eyed and bushy-tailed, believing I had all the time in the world to find the perfect home at the perfect price. I spent a year and some change progressively lowering my standards while increasing my price limit, and in the end, I was so exhausted by the whole process that I ended up buying pretty much the most expensive house in the whole neighborhood, even though it had many issues ranging from mold, failing appliances, antiquated electricity, and deteriorating plumbing, just because I was tired for looking for something better.

I regularly question my decision to make this purchase. I am, after all, Mrs. Thrifty (no one calls me that, but they should!), and here I just blew my life savings on an arguably overpriced home. I have talked to people who, unreasuringly, give me looks of shock when I tell them how much I paid (I will tell you a little bit later, in an entire post dedicated to the financial side of this escapade). I justify the expense with my insider knowledge of just how competitive the market in my target neighborhood is. Let's have a look at my seven purchase attempts (of course, I toured many more houses, but rejected them outright for a number of reasons).

The first 4 offers I made were detailed in a past blog post, but I'll briefly summarize them again:

  • July 2015 - The house in Hyattsville - my first offer, remains probably the best value on this list, in the best condition for the most reasonable price (and the only one with a completely separate and ready-to-live-in basement apartment), but I felt like I was getting cheated, and I had a strong incentive (in the form of a 15,000$ forgivable loan) to buy in College Park.
  • August-October 2015 - The short sale - In retrospect, this was one of the best-priced houses out there, and I should have snapped it up when I could have bought it for 220,000. But I was being greedy (and perhaps still a little ignorant of the highly competitive market) and tried a bit too hard to negotiate the price down, losing my chance to purchase it when the sellers decided to start paying their mortgage again (I console myself by saying that that would have happened even if I had accepted their counter-offer).
  • October 2015 - The fakeout - When talking with my boyfriend, I call this one "The One with the Collapsing Basement." Having a dangerously flawed foundation is kind of a dealbreaker, but even knowing that, I spent many months thinking fondly of how perfect that house was in all other respects.
  • November 2015 - The Last Resort - The last house I blogged about, I think of it now as "The One with the Orange Kitchen." Let's face it; even though I claimed to be so desperate I'd take it even though it wasn't quite what I wanted, when I learned I couldn't get any heat to come into the basement bedroom (my anticipated rental cash cow), I had to let it go.

After this point, I vowed to not blog any more about my dismal housing search, because the public admissions of failure were really starting to get me down. I kept silent when I heard the disappointing results of my next two offers:
  • February 2016 - The One Next to REI - This house was so cute! It was nicely landscaped, it had a basement with a couple of (not-legal) bedrooms and a mini kitchen. It had two bay windows (not a trifling matter to someone who loves both sun and houseplants). Alas, I still hadn't learned my lesson about the competitive market, and I made a too-low offer. Someone outbid me by offering the asking price (which I totally would have paid if I had been given the opportunity to increase my offer!) This one was a heartbreaker.
  • April 2016 - The One with the Blue Room - It didn't have a basement, it didn't have an upstairs. The only thing it had was a nice secluded bedroom with a bath, and a refrigerator in the laundry room, so I thought I might rent that part of the house out. I wasn't really crazy about this house, but I was desperate. My offer (equal to the asking price after you take into account my request for closing cost assistance) was rejected, and I was disappointed, but I think I would have been more disappointed if I'd actually ended up owning the place.

And that brings us to May of 2016. By this time, I had saved 19 houses on Zillow and seriously considered buying all of them. I was a house-shopping expert. But I was losing hope. I had previously promised myself that if I hadn't found a place by the beginning of May, I'd apply for one of the cheaper apartment buildings in the area. Still, I was procrastinating. More houses were finally being listed. Maybe I really would find something. I would make my rental application at the end of the month.

And it's a good thing I waited, because on May 1, I put in the offer on the house that I would end up owning. This time, I decided to pull out all the stops. I offered the asking price AND threw in an escalation clause that would increase my offer by 10,000 dollars if there were other offers. And there were. Six others. But somehow mine was the one that made the final cut.

The next few weeks were a poorly timed whirlwind. I actually received the phone call telling me my offer was countered while I was in New Orleans—a trip which, as you know, was followed almost immediately by trips to Richmond and Hawaii. The majority of the negotiations happened while I was on vacation. Can you imagine trying to make sound business decisions while shouting into your cell phone over the sound of hundreds of revelers dancing through the streets? Or trying to shop around for the best possible deals using crappy hotel wi-fi? I am sure that if I had had more time to myself between making my offer and my astonishingly early closing date, I would have been able to save a buck here and there. But because I didn't get enough opportunity to do a lot of extensive research, I basically just had to accept whatever was offered to me as far as my mortgage, my pest inspection, my title company, my title insurance, and essentially all things you are technically allowed to choose for yourself as a home buyer.

I also almost missed my opportunity to apply for that 15,000$ forgivable loan I mentioned, because I was so busy surfing and attending weddings that I neglected to read the deadline information. There were a lot of money matters that didn't go exactly as my usual stingy self would have liked. In fact, to this day, I don't know what monetary value the other offers were, and I wonder if the sellers were able to just milk me for all I had because they knew I would be willing to pay it...Well, I can go around with myself forever about whether I got the best deal possible, but in the end, I paid an amount that I could afford, and after 9 months of struggling, I guess that's all I could hope for.

Besides, there's something to be said for just not caring. Because I wasn't able to take control over the little details of my purchase, I was able to cultivate an almost Zen-like attitude (at least as Zen-like as the constraints of my admittedly high-strung personality would allow) about the whole deal. Matters were mostly out of my hands; I just had to let go and let God, as they say. Because of this, the weeks preceding my closing were actually surprisingly low-stress—you'd never guess it from the way I talked, but complaining is my middle name. I was actually getting plenty of sleep, finding plenty of time for fun, and basically going on with life, as opposed to frantically scrambling to make this the best real estate transaction that had ever occurred.

Now that the dust has settled (and more is probably being kicked up as I write this; I had mold remediators come in yesterday to begin treatment of the basement and attic), I am able to sit down and write a nice long epic about the last year-and-a-third in my housing life. It's not the most chipper way to begin my next chapter, but it is something I need to get off my chest. In the future, I'm sure you can look forward to many more posts about my home.
Here's a sneak peek:
Somehow I got suckered into dog sitting the inimitable Bubalou on the day of my closing!